If you just got a pneumatic engraver, chances are you’re about to go through a really frustrating phase.
You watch other people use it—smooth as silk, lines clean and steady, like the tool is part of their hand. Then you try it yourself… Either it shakes like crazy, or the tip just skids right off and does whatever it wants.
And then the doubt creeps in:
“Maybe I’m just not cut out for engraving?”
“Maybe this machine is no good?”
Yeah, I thought the exact same thing.
Later I figured out—it wasn’t that I was bad at it. I just hadn’t tuned it right. With a pneumatic engraver, the air pressure, the tip, your grip… if any one of those is off, the whole thing feels wrong.
So in this post, I’m going to walk you through all the mistakes I made, one by one. Hope you don’t have to waste as much time as I did.
Why do so many people think pneumatic engravers aren’t good?
A lot of beginners, the first time they use a pneumatic engraver, feel like—the vibration is all over the place, the tip just won’t listen, and they can’t control it no matter what. But honestly, nine times out of ten, the problem comes down to tuning.
This thing is totally different from a hand graver. It’s a tool that needs to work with you. You meet it halfway, and it’ll meet you halfway too. Get it dialed in right, and it glides like a dream. Get it wrong, and it feels like the tool is deliberately fighting you—every stroke is just awkward and frustrating.
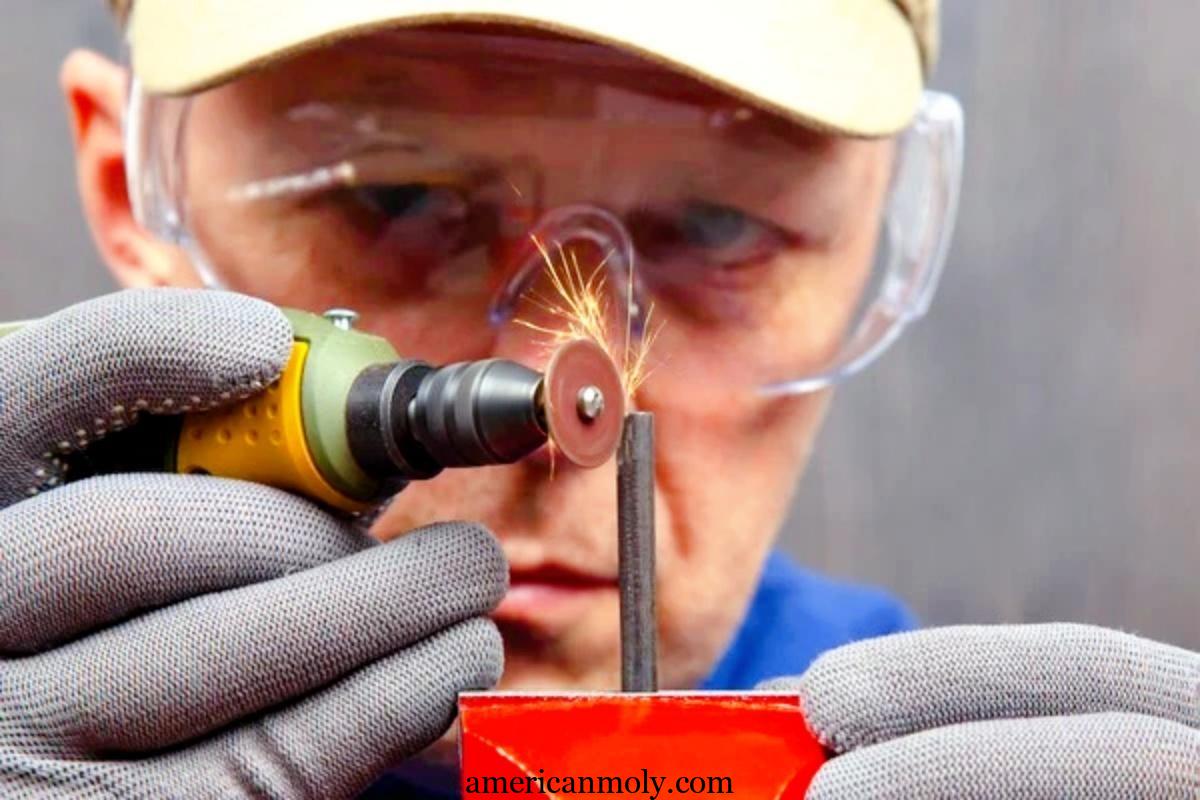
First, get this one key point: what is a pneumatic engraver actually doing?
You don’t need to memorize all the complicated theory—just remember this one thing. It uses air pressure to push the tip, making it vibrate rapidly with tiny, fine movements. Your hand’s job isn’t to push down hard—it’s just to lightly guide it and point it in the right direction.
So the whole thing comes down to two things: the vibration needs to be steady, and the tip needs to do what you tell it. And there’s no shortcut for either—it’s all about slowly tuning it until it feels right.
5 key adjustments every beginner must know
This part is pretty important—it basically decides whether your engraving experience will be smooth or a total headache.
- Air pressure adjustment
A lot of beginners think: the higher the pressure, the more power you get. Wrong. If you crank up the pressure too high, the tip gets super aggressive. It’ll skid the moment it touches the material, and you won’t be able to control it at all. I used to set my pressure way too high, and all my carvings came out with those nasty “flying lines”—all over the place. Then I slowly turned it down and realized: stability is way more important than raw power. My advice? Start low, then gradually increase the pressure until you find that sweet spot where your hand doesn’t shake and your lines stay steady.
- Stroke adjustment (a.k.a. travel)
Basically, this controls the “impact feel” of the tip. A longer stroke gives you stronger impact—great for rough carving or blocking out. A shorter stroke makes the tip’s movement finer and more delicate—perfect for detail work and thin lines. These days, I switch settings depending on the phase of the job: open it up for rough work, dial it down for fine details. Just be flexible.
- Grip on the handle
This one gets overlooked a lot. A lot of people hold the handle way too tight—like they’re afraid the tool is going to fly away. But the tighter you grip, the worse your control gets. The right feel should be steady but relaxed—kind of like holding a pen to write, just a tiny bit more stable. I used to grip too hard, and my hand would get sore after a few minutes. Then I tried loosening up, and suddenly my control got way better.
- Tip selection
Different tips give you completely different results. For beginners, I suggest starting with a basic tip shape just to practice your lines. Don’t go crazy buying all kinds of fancy tips right away. When I first started, I got greedy and bought a whole bunch, but I couldn’t use any of them well. Later, I just stuck with one type and practiced with it, and my progress actually took off.
- Cutting angle
A lot of people don’t realize this until later. If your angle is off, the tip will catch, your lines won’t be smooth, and the surface will look rough. It’s best to keep a steady angle from the very beginning—don’t change it up constantly. Once you’re more comfortable, you can start adjusting it little by little.
Get these five things right, and your pneumatic engraver will pretty much do what you want it to do.
What changes after you get it tuned right?
The difference is huge.
Before I got it dialed in, I was all over the place—hands shaky, lines all crooked, I couldn’t even stand to look at my own work. And that kind of situation? It really makes you want to just give up.
But after tuning it? Totally different feeling. The tip listens to you, it’s super easy to control, and honestly, you’ll start getting addicted to carving. By now, I’ve almost become dependent on that smooth, dialed-in feel. Because once it’s right, you really start to enjoy the whole process.
One last honest word
A pneumatic engraver really isn’t hard. You just haven’t found its rhythm yet.
Tune it right, and it’ll help you—not fight you. If it feels off, don’t blame yourself right away. Just take some time to adjust it.
A lot of the time, what you’re missing isn’t skill—it’s that little bit of feel that makes it all click.


Leave a Reply